Lampshades
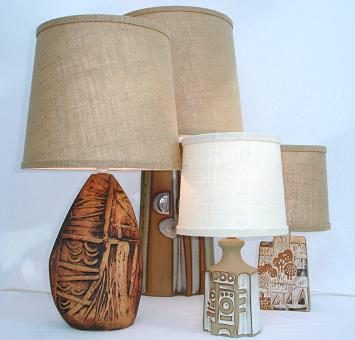
The lampshades supplied by the pottery were almost exclusively made of hessian. They were tapered drum shades, the largest being 16" and the smallest 8". They came in a range of colours including green, blue, orange, oatmeal, and natural. Natural hessian was probably the most popular and was always included with the small boxed figural lamp bases. The lampshades were made with a band of hessian tape around the top and bottom of the shade. Jute grass lampshades were available as an alternative for a limited period.
Few original Tremaen lampshades have survived and it is almost impossible to find a close match in the appropriate size and colour.
I use all my lamp bases and, frustrated by the lack of suitable alternatives, I have resorted to making my own lampshades. I have tried to make them as close to the originals as possible. All of the lampshades opposite were made by me.
I have been contacted by others who have had similar problems and so the following instructions on how to create a template and then make a lampshade may be helpful.
Suppliers of materials can be found in 'links'. If you need further help or advice on sizes for certain lamp bases please don't hesitate to get in contact.
Creating a template for an 8" shade
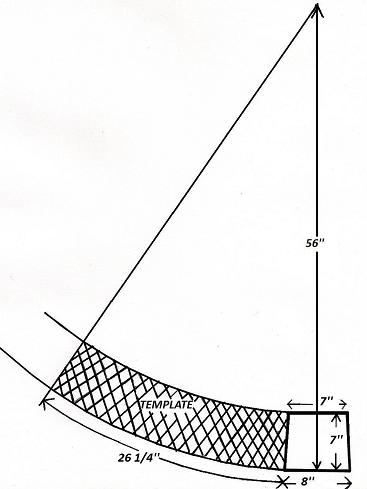
Template Diagram
I found creating the template the most difficult part. Once you have made the template, however, making the shade is relatively easy.
A lampshade is essentially a truncated cone. The point at which the cone is extended to the vertex is the centre of the arc which will be used to form the top and bottom of the template.
The diagram shows the dimensions to make a small lampshade with a bottom 8" utility ring. The top plain ring is 7". The height of the lampshade is 7".
Templates for larger lampshades can be made using the same proportions with adjustments for increased dimensions.
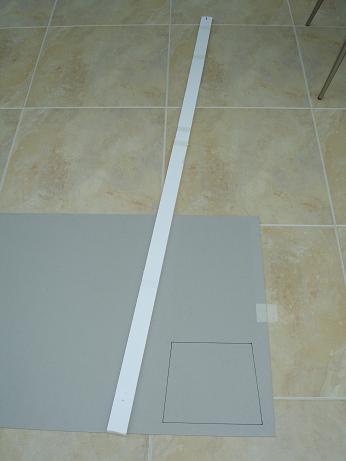
Step 1
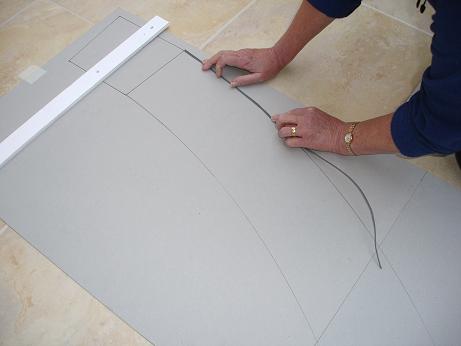
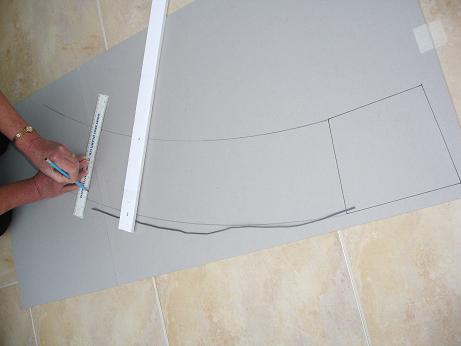
You will need at least two pieces of card to make the template. Draw the shape of the lampshade, as in the diagram, at the bottom right on the card. Fix a pin 56" above the centre of the bottom of the lampshade.
Step 2
Using string or strips of foam board attached to the pin, draw two arcs from the corners of the top and bottom of the lampshade. I found that the foam board worked better because you can push a pencil through it and string is inclined to stretch.
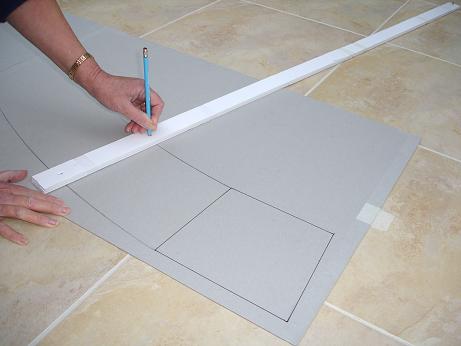
Step 3
Measure 26 1/4" along the bottom of the template using string or wire. This is the circumference of the bottom ring with an additional allowance for the overlap.
Step 4
Mark off the end of the template making sure that the angle is pointing towards the pin at the centre of the arc.
Finally cut out the template.
Making the shade
Step 1
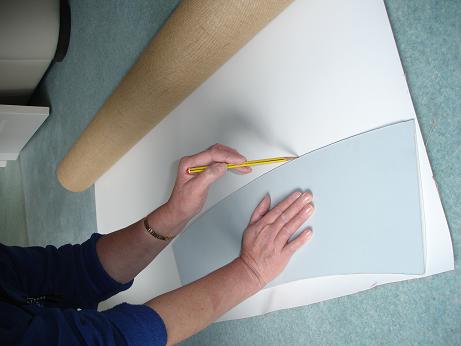
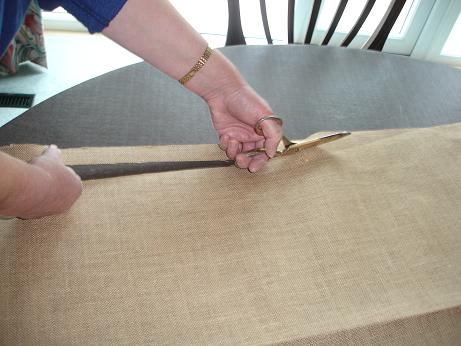
I use the hessian that is already laminated onto the vinyl backing but you can laminate your own. Trace around the template on the laminated side. Cut out the shade ensuring there is a crisp edge where the shade will overlap.
Step 2
Run 3mm strong double sided adhesive tape along the bottom and top edges of the shade. Place a strip of 25mm ultra, permanent double sided adhesive tape at the right hand end.
Step 3
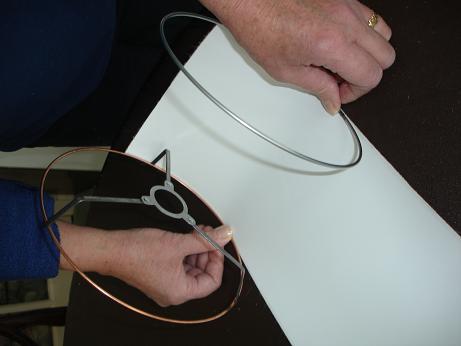
Peel off the siliconed protective strips on the 3mm tape. From the left side roll the bottom 8" utility ring and the 7" top plain ring along the adhesive tape. An extra pair of hands is useful here.
Step 4
Peel off the siliconed protective strip on the 25mm adhesive tape and continue rolling shade. Then press down firmly on the overlap.
Step 5
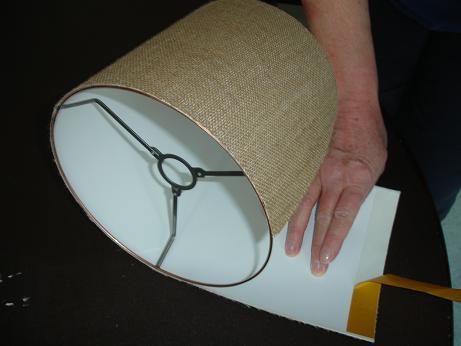
Run self adhesive tape (ivory) around the top and bottom of the shade, ensuring that there is sufficient tape to tuck inside, covering the wire at the top and the bottom.
Step 6
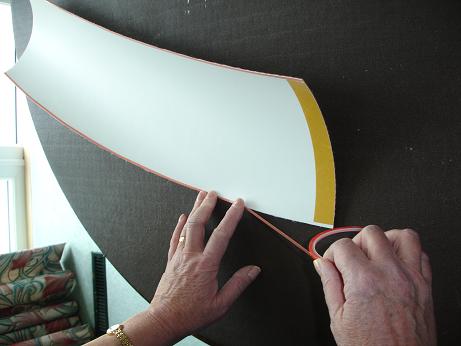
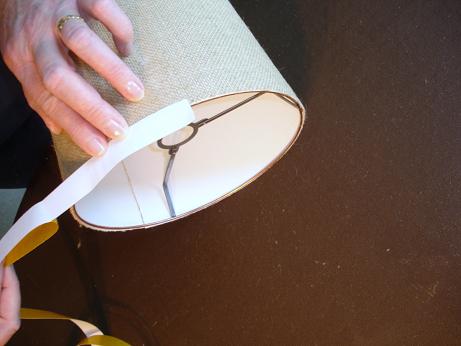
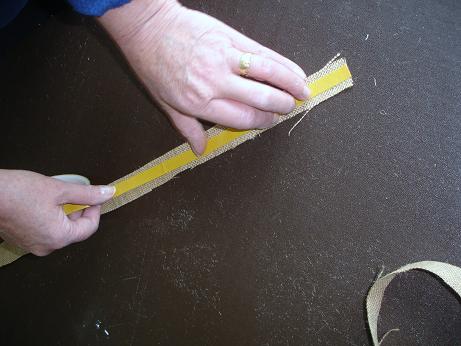
Cut two strips of hessian (not laminated) 27mm wide and long enough to go around the top and bottom of the shade.
Step 7
Run a strip of 12mm ultra permanent double sided adhesive tape down the middle of each strip.
Step 8
With the protective siliconed strip still on, fold over the hessian on both sides. This will help to make a neat result.
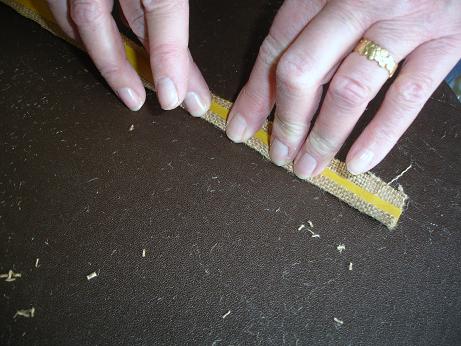
Step 9
Gradually removing the protective siliconed strip, fold over both edges pressing down firmly.
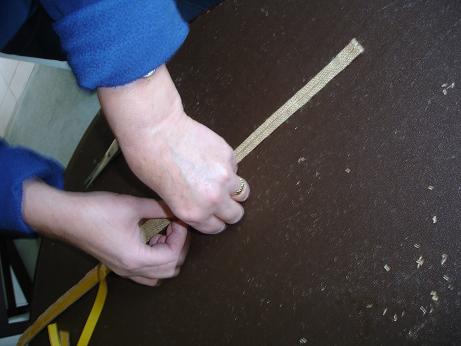
Step 10
Using a suitable fabric adhesive, glue down the hessian strips making sure that the joins will be at the back near the shade overlap.
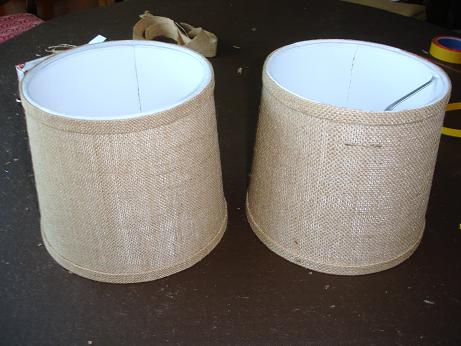
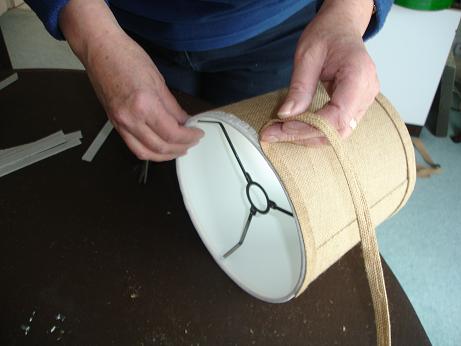
Completed shade
The shade on the left is the shade that I made and the one on the right is a Tremaen original. The only difference is that I used a utility ring. On the original the light fitting is attached to the top ring.